READ WELL BEFORE.
material for use ANGEL FACE.

This is a list of all known materials and are almost always used:
- Scissors, needle, pins, thread to machine, thimble, fill, coarse linen yarn, hank Moulin orange and taupe, filler.
This is another list of tools.
- A fine hook, a soft pencil or pen water, needle, wool, wire of 0.60 mm., A long thin screwdriver, a wire cutting curling iron, a curling head round, white acrylic paint black and red pen.
Fabrics:
- Felt yellow or gold, raw solid patch, solid flesh-colored patch.
- Scissors, needle, pins, thread to machine, thimble, fill, coarse linen yarn, hank Moulin orange and taupe, filler.
This is another list of tools.
- A fine hook, a soft pencil or pen water, needle, wool, wire of 0.60 mm., A long thin screwdriver, a wire cutting curling iron, a curling head round, white acrylic paint black and red pen.
Fabrics:
- Felt yellow or gold, raw solid patch, solid flesh-colored patch.
Note: angel's face is smaller, is 80% of the original.

BEGIN:

1 - Draw the outline of the wing pattern in fabric layer, marking the opening in the locations shown in the picture .
 2 - Now we have to make a sandwich. The position and order of the layers of fabric and padding is important.
-first position in the fabric will be placed where we set the pattern. This fabric is the back wing.
"Secondly there is another fabric. As I do not look solid, the position without more.
-Third post the batting. The fabric that we have and batting second will be the FRONT of the figure, there were embroidered stars. We advise you to do a mark to know which part is the back or side is the face.
-Third post the batting. The fabric that we have and batting second will be the FRONT of the figure, there were embroidered stars. We advise you to do a mark to know which part is the back or side is the face.
As always, the very fine batting 80% cotton, 20% synthetic is our favorite.

3 - After the contour sewing machine you have to do three stitches that are shown in the photo. These pickets are given in the concave area of \u200b\u200bthe wings.

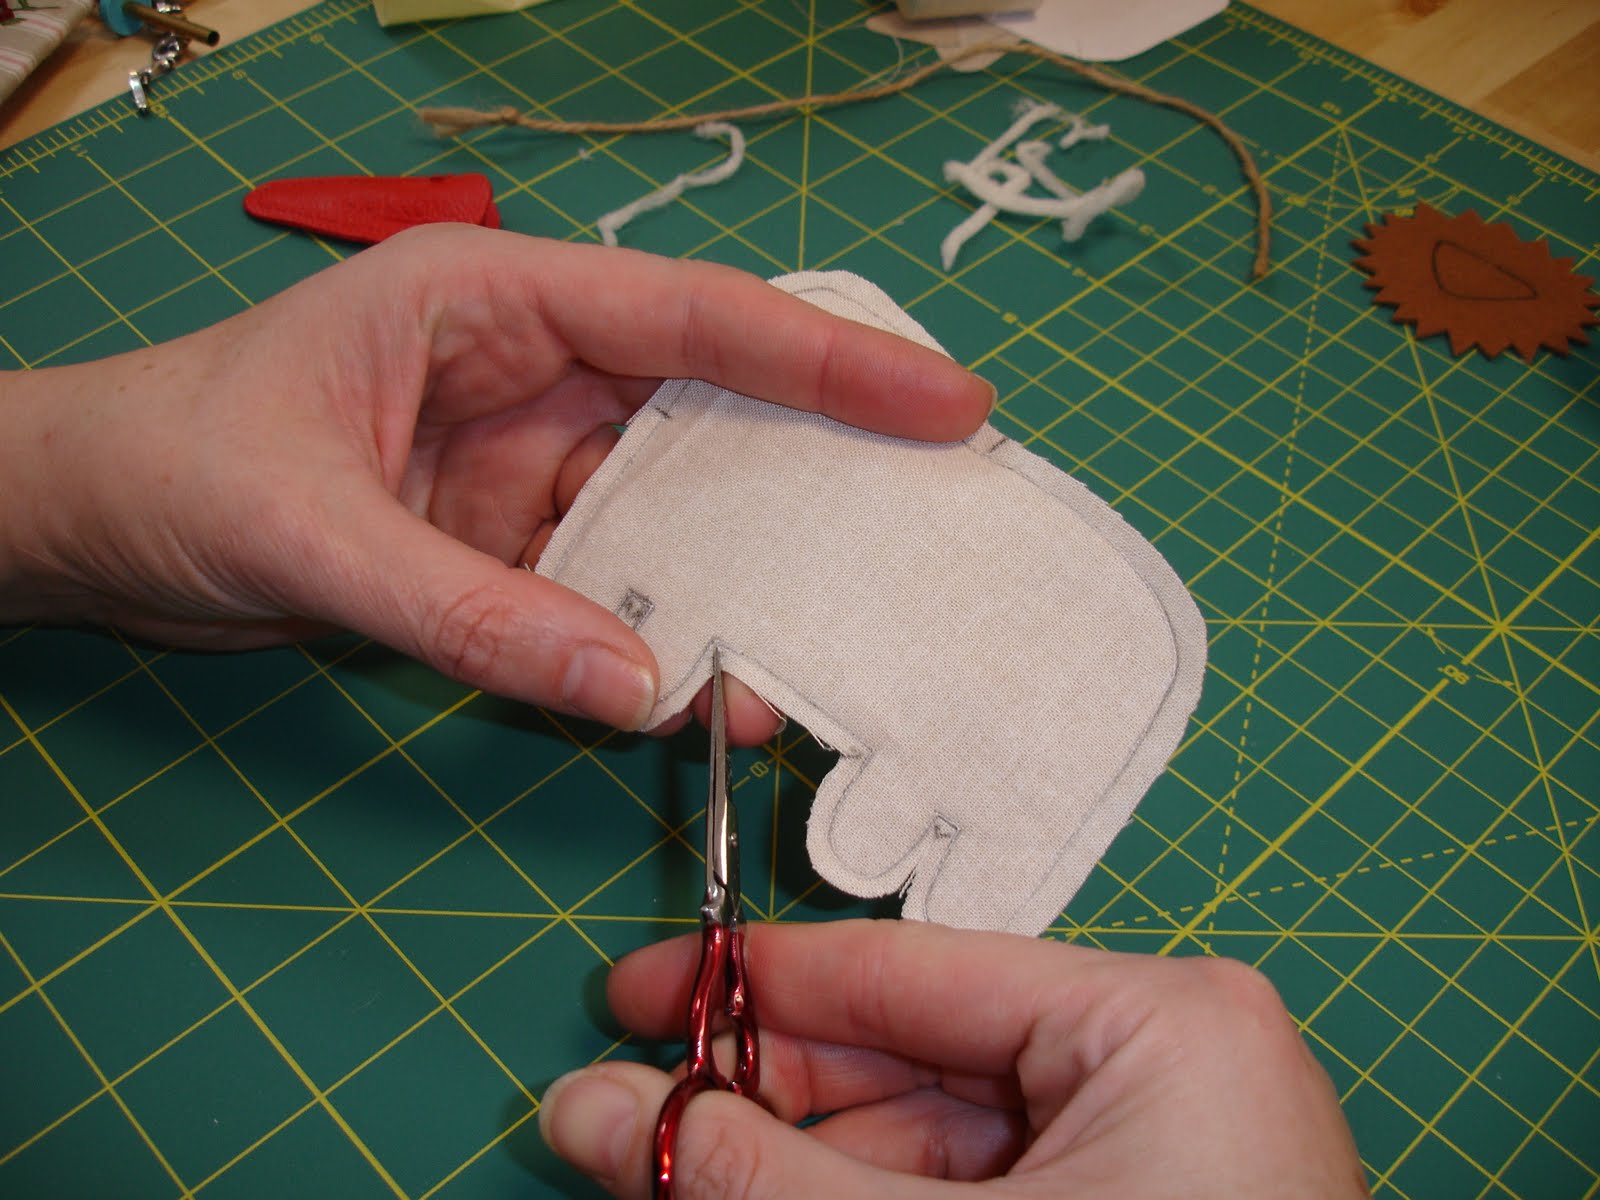
4 - This would be the wings after sewn. As always, finishing at the point where it begins the opening, continue sewing slowly and a small stitch and finish back at the point where it ends up opening it has set, then cut along the outline stitching and a margin of 3mm do pickets for convex areas of the wings (shown in photo) and trim the excess batting range. Care to cut the batting Go not to bite the fabric underneath.
 5 - boring benchmarks to embroider the stars.

6 - Once the piece turned tracing the points made in the previous step, it is padded slightly and begin to embroider. It uses two wire ropes mouliné in dark orange.
 7 - Now prepare the face for sewing. We first outline a layer of fabric. ONLY CONTOUR .
 8 - This step is different from what we have been doing so far. In theory, we should make the sandwich, sew, flip, fill, and finally, draw freehand angel face paint, but .... Is to note that, so we will trace for us much easier to paint.
The second step is put under another piece of fabric the pattern and trace the features of the doll. If you do not look good you have to set the pattern and fabric in the window for light transparent fabric and can be copied easily.

 9 - Now we have to match the contour void that we did in step # 7 with the side we have modeled. We make sure they match exactly the two points where the neck ends and subjected the two fabrics with pins, the position of the fabrics is important (see photo).
 10 - Now put the wadding positioned, as always, last and sew by machine, slowly and with a small stitch. We begin, as always, at the point where the opening starts, finishing well and we sew all the way around to the point where the opening ends. Finish off again.
 11 - This picture we have to look good as we have subjected the sandwich with pins, making it perfectly match the contour of the first web and second. We tacked to remove the pins when sewing machine.

12 - Once stitched, machine quilted trim the margin, only the margin and give bites that you see in the picture around the head (convex zone) to avoid forming peaks and ends where the neck (hollow area) and the face begins to pull no seams once turned the piece. Fill slightly, neck does not get filled.

13 - Following the line that we did with the water pen and utlizando two strands of DMC in taupe mouliné given stitches behind large and equal to embroider the mouth.

14 - to embroider the nose using the same thread for the mouth, using both ends of it.
The first step to do it and it is bulging out the needle is one of the upper ends of the nose.
The first step to do it and it is bulging out the needle is one of the upper ends of the nose.

15 - The second step is to make a stitch (not very big) in line drawing and removing the needle at the opposite end where we have gotten in the previous step.
 16 - The third step is to make a stitch in line drawing and removing the needle on the opposite side a little lower than where it finished the previous stitch. I think the picture looks good.
 17 - Now repeat stitches (the stitches are the same) and took the needle on the other side.

18 - From time to time pull the thread to the fabric to wrinkle and bulge nose. Upon reaching the tip of the nose top.
This stitching is repeated until reaching the tip of the nose. Rematar.
This stitching is repeated until reaching the tip of the nose. Rematar.
 19- Una vez hecha la boca y la nariz tenemos que pintar los ojos. El pincel que hemos utilizado es un "Lotus Deco" de triple cero al que le hemos cortado la mitad de los pelos. Hay personas que prefieren un mondadientes para pintar cosas pequeñas y precisas pero.... sinceramente si tenéis buena vista, el pincel es lo mejor. La pintura es blanco acrílico.
Empezando por el ojo izquierdo pintar una media luna sin salirse de la línea que habéis hecho con el rotulador de agua. Pintar la media luna en el ojo derecho y dejar secar.
Cuando la pintura esté seca, impregnar un algodoncillo en agua y retirar la marca del roturlador.
 20 - Now paint the eyes with a black acrylic paint and let dry.
 21 - These two steps are optional and do not bring original instructions but it is nice and paint the lid line ....
 22 - ... and a white dot at the top right of the pupils.
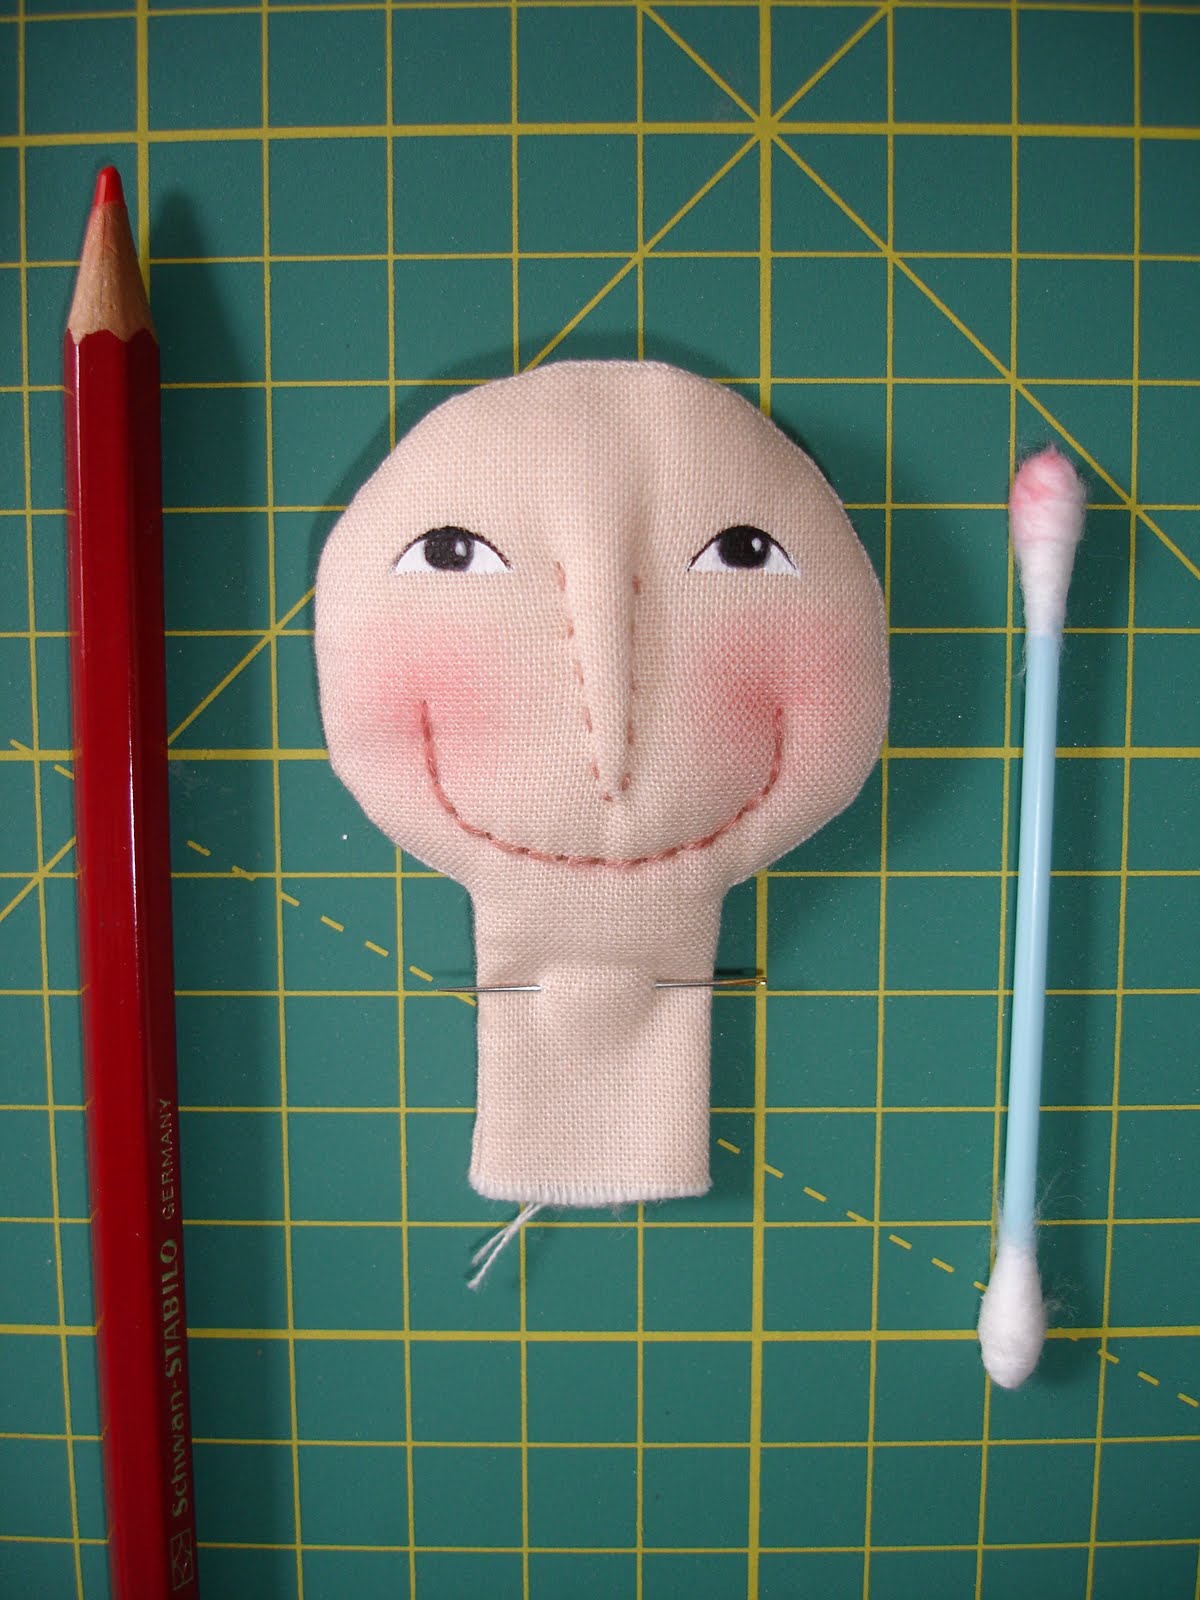 23 - Finally and finally apply the blusher. We use a red paint and a swab to blend the color. I refer to "a cat" for that you read paragraph 17 and 18 we explain how to apply blush.
24 - Once face, the wire work used to hang the picture.
wire we used is always the same, ie silver and 060 mm. thickness, the length is that you enjoy yourselves.
The first step is to make a double loop with rounded tip tweezers on one end of the wire.
 25 - The second step is to go screwing in a small tube. Stop screwing when the spring is formed is the desired length ...

26 - ... and finally, remove the tube spring and the other end we have to make another double loop with the pliers.
 27 - Now you can make three rings. Reserve them for later use.
28 - Put the neck of the angel's face by the opening on the wings (see photo for position) and sewing machine. We've finished the leftover yarn by hand.

29 - Once finished sewing and throw his head back and hold to the wings with a hidden stitch.


30 - Put your hair with heavy thread or linen twine. (See pictures).

 The five points where you will place hair.
 31 - Now we will hold the spring we've done before. Using wool aguaje do holes in the wings.
 32 - We put one of the rings we have reserved and a loop of the spring in a hole. We repeat the same in the other hole of the wings.
 33 - Finally we make a tiny star in gold felt (ours measured tip to tip), we make a hole with the needle wool, we put the ring that remains in the hole and hang the spring. While all the rings closed.