
This Saturday is the street jam in Castellon , not miss it!


 2 - then you must copy the outline and facial features in another layer of fabric. It is advisable to use a pen or pencil soft water. Spend very soft pencil.
  3 - Now are matched exactly, especially the part corresponding to the head and face, the outline that we have passed to a layer of fabric and contour to the features that we have drawn on another piece of cloth . With pins to make sure it does not move and put the padding back to the sandwich.
 4 - Before we can remove the pins to baste it is easier to sew the machining contour. We have placed the pickets to be given after cutting the outline right in the neck (see photo).
  5 - This figure will be cut after the contour along the lines of stitching, after removing the padding and margin to the pickets below the neck and around the head.
  6 - We looked the part, taking it all seams to the back of a hook and fill it starting slightly mind. We put very little filler and finally becoming close the opening with a stitching machine. Finish off well.


 A jacket you have to sew two buttons on the color you like.
  10 - We have prepared the cardboard soaked in fixing hair spray strong. When drying iron very well and with a white painting draws the outline of two boots and two gloves. We cut out the parts in the line very well have done.
  11 - The scarf the red felt cut off, 1.5 cm wide and long that you enjoy yourselves. Eventually cut the fringe.
  12 - dress the skater, we put the pants and attached to the body by stitching.
  13 - When we have finished sewing the pants at the waist, we put a bit of stuffing the pant legs.
  14 - Now we have to make the leaves of the skates.
  ... and we help of your thumb and forefinger to rotate the wire. With a spin and a half is enough ...
 ... cut to length and finished with a small curve at the other end of the wire.
  15 - White-tailed impregnate the Boot tab.
  16 - We put the shoe between the flange and the boot and press with fingers to set the glue. We repeat this operation on the other boot.

 17 - to stick the boot to the pants glue is applied to both sides of the boot and on both sides of the pants, you enter the boot in the pants and pressed with fingers. Repeat the same procedure for the other leg.
  18 - To set the mouth glove-sleeve jacket repeats the operation done previously with the boot.
  19 - He tied the scarf and you're done.
  Warps Staple (Prof. Ingrid Malbranc)
  and the fabric continuously as usually happens, but it changes color as links to other fabric of another color. The frames also work intermittently thus achieving full-color forms. Development: This seminar will draw up a little web of simple geometric patterns using two or three contrasting colors.
  The thread or cord fabric woven with more or less complex knots called Macramé. Is done by hand and used to create crafts from very small to very large, such as potting media, belts, bracelets, necklaces, bags, lamps and curtains. Cavandoli
  Development: Making a medallion with geometric designs and a flower. History, calculus and mounted thread designs.
 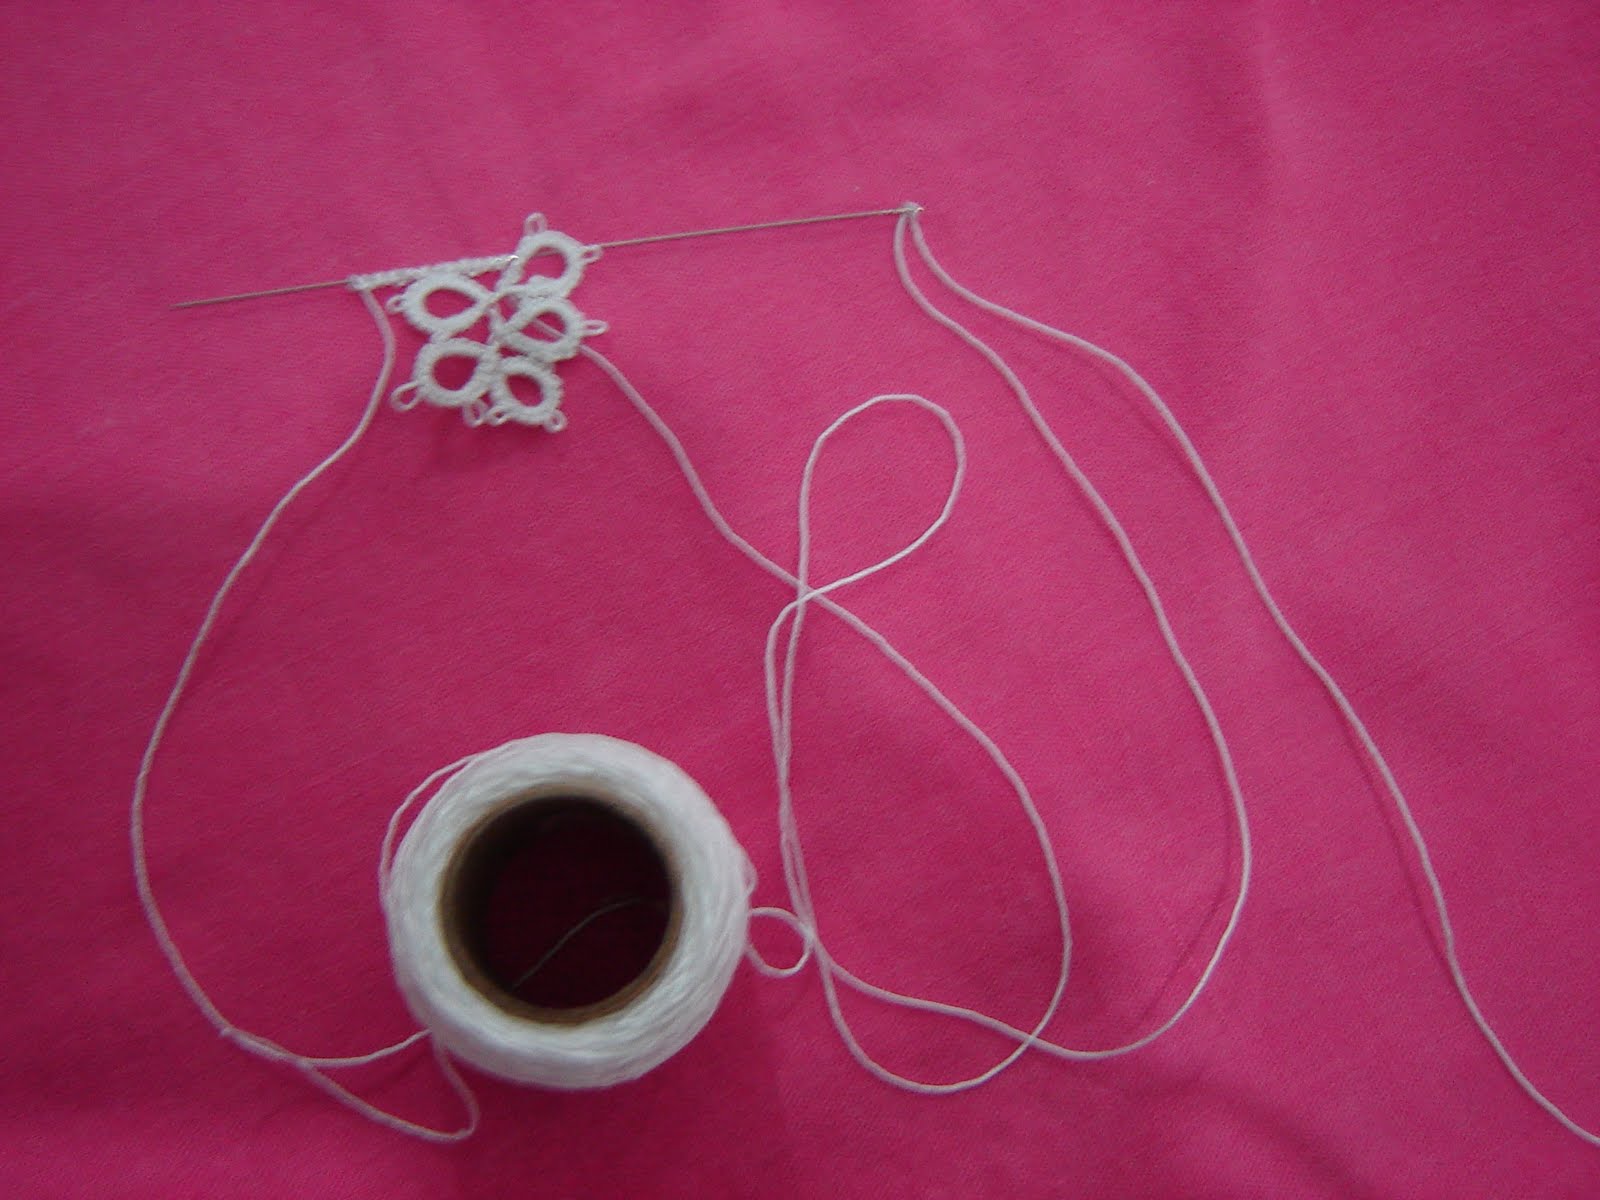 The variety is tatted lace. It is found under the name of "fit to the shuttle" in Spain, "tatting" in Great Britain, "occhi" in Italy and "makuk" in the East. Technically a series of knots and baguillas on a single thread, threaded on one or two shuttles. The proposal of this seminar is to use a needle instead of thread out of the shuttle or shuttle to
  simplify certain movements and allow greater ease of development.
  The proposal is leave it to our creative power. This is not a traditional tapestry, but to let the elements are "ordered" from our suggestions and agreed to go with that building this tapestry unconventional basically done with plant material that you can add other elements such as wool, threads, etc..
  previous structure that will serve as the basis for the tissue. The design will individual participant. The idea is to leave to our creative side and free to play with the imagination and the material available. Try to go in this game guiding them.
  tubular fabric is known as a double cloth, in this case we will see in three layers. It is a technical reference for Lequan, Cochabamba, Bolivia. It works in face warp, which alternate three groups of warps of different colors that are shown or hidden according to the drawing, making a double fabric is indispensabl
  and have knowledge of tubular tissue
  The plot twist or twine is also known as "chain" or "Peruvian point." It is used in weaving fabrics to ensure the beginning and end of a cloth, baskets and special way to intertwine the fibers and textiles Creoles and conducting ethnographic peleros and tapestries. For failing to Heald or shed some technical specialists refer to as the Pretzel and is easy to perform. In Argentina dominated the tapestries made this technique in the province of Formosa and are made by women Qom (Toba) in wool. There is also work in fiber Wichí chaguar by women but are less abundant than those of wool. The idea of \u200b\u200bthe workshop is to "draw" with this technique some simple designs as an introduction to the mat and face frame techniques. Development: Making a tapestry fabric twine
  you natural fibers, gauze, silk, linen, etc.

 1 - With a soft pencil or pen to copy the outline of the water pattern on a layer of fabric. It copies only the outline. The opening to turn the piece is located across the base, remember that this part does not sew. Nor is sewn openings to put the arms on both sides. We cut the pattern to give the neck a little taller and not pull the piece by that party to give back.

 5 - This will be the angel's body once it has cut the margin, the extra padding and pickets have been involved.
  6 - The arms and feet "Angel Easy" are made with sticks and then glued with hot glue to attach them to the web, but we thought that the doll would be more elegant with cloth arms and legs (ie leave it to your choice).
  7 - These are the arms and legs cut off and flipped once, the next step is to fill them with a screwdriver, very little, without going to the landfill on the edge and getting very little filler in time.
  These are the arms once filled.
  8 - This is the doll with arms and legs. The legs have to position them at the base of the trunk, basting the fabric to fix them later one stitched by machine.
  9 - With a triple-0 and brush with white acrylic paint eyeballs, with the same brush red painted mouth. Let dry.
  ... then paint the iris y. ..
  ... the upper eyelid. The white dot will light in the eye.
  10 - Now with taupe DMC thread and using a work out your nose. If you can not remember how to sew check the entry "An Angel Face."
  11 - To end the face apply blush.
  12 - copy the outline of the pattern dressed in a gingham plaid fabric or similar. Copies of two layers of fabric and leave an opening in the part that corresponds to the neck. We have made the opening a little larger than the original, as seen in the photo.
  13 - This is the dress ready to flip, with pickets made the armholes and the mouth-sleeve, low neck without sewing.
  14 - Dress flipped and three red beads sewn on the front. Between the second and third beads more space because they will have to put a belt.
  15 - Once dressed the doll will make a small stitch on the cuffs, pull the yarn to knit and topped the thread.
  16 - The angel dress will be closed in all its base by a small stitch. Stick a little padding before sewing the bottom to the dress is a bit inflated. By giving the stitching catch the under clothing and legs simultaneously.
  The base of the dress will be closed as shown in the photo.
  17 - To make the wings we used the cardboard from a box of Christmas cakes and the pattern we have used to make the Christmas Angel.
  18 - It copies the shape of the wing pattern of the carton upside down and mark the two center holes.
  19 - Trim just the pencil line and drill the two holes with a needle wool.
  20 - The wings are attached to the angel's back by a few stitches in the holes made earlier. Top well.